Memory Card Data Recovery Procedure
How to recover deleted files from Memory Card?
Memory card recovery software recovers deleted digital photos, pictures, songs, images, audios, videos and other precious data from corrupted memory card of all capacity.
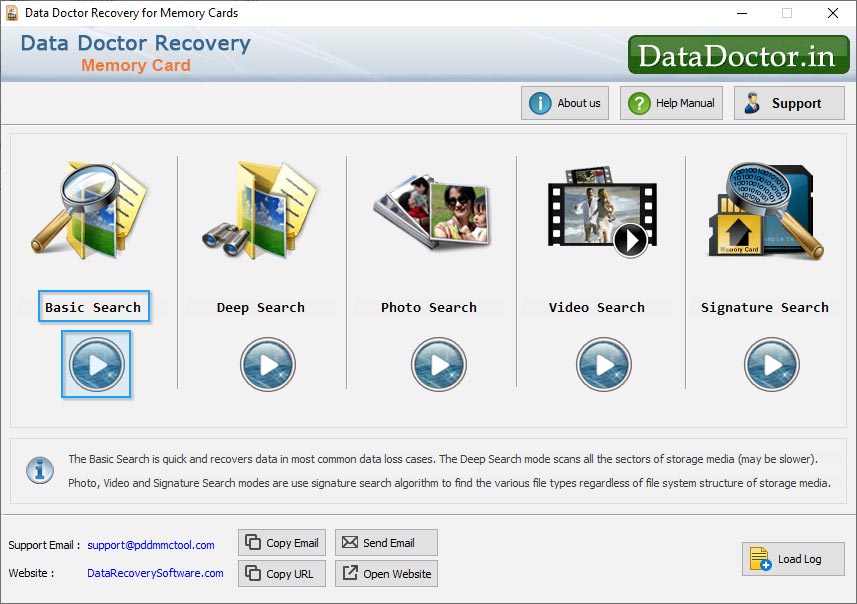
STEP 1 After successfully installing DDR - Memory Card Recovery when you run the software, the following screen appears:
Select the 'Basic Search' searching criteria and click 'Next' button to proceed.

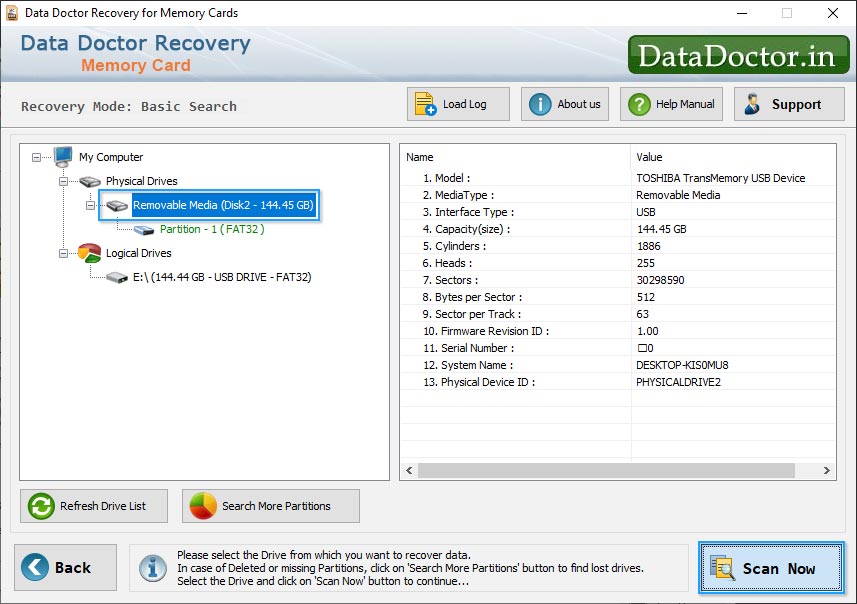
Select disk from left panel from which you want to recover data from list of available Logical or Physical Drives in the left panel. If you want to recover data from "Logical Drive", then select Logical Drive option, then select the "Logical Disk" from which you want to recover lost data.

If you want to recover data from "Physical Drives", then select Physical drives. Select the "Physical Disk" from which you want to recover lost data.
Click on 'Next' button to proceed.
Note1 : Click ‘Refresh List' to see the updated status of all connected disks to your PC.
Note2 : If the partition from which you want to recover your details is not in the list, click 'Search More Partitions' button to search other Lost or Deleted Partitions.If your disk partition was formatted with different file system and now your disk partition is shown with another file system, then in that case you need to select the previously existing file system from the drop down list to perform the lost data recovery.
STEP 2 Select the partition from left panel from which you want to recover data, details of the partitions will be displayed in the right panel, as shown in [This screen]
Click on 'Next' button to start searching Data or click 'Back' button to go back to previous step.
STEP 3 [This screen] shows the drive is scanned for the deleted or lost files and folders.
Note: You can stop searching Files and Folders by clicking on button. It is strongly recommended that you should allow the software to complete the searching process.
STEP 4 Once completing the searching process, the recovered files and folders is displayed as shown in [This screen]
After the scanning, scan result will be displayed in tree structure. Now, you can view the recovered details with the Name, Type, Size, Date and Time parameters or you can click 'Back' button to go back to the previous step.
You can save either all or selected files and folders on choosing any of the options listed below:
From the left side panel
Select the folders from Left Panel Directories Tree and click on "Save" button in Toolbar or right click to save recovered files and folders.
From the right side panel
Select the files and folders from Right Panel
Right click on the files
You will see popup menu with options : Open, Save, Save All
Perform the ‘Save’ or ‘Save All’ option according to your choice.
You can open the recovered files using Open option.
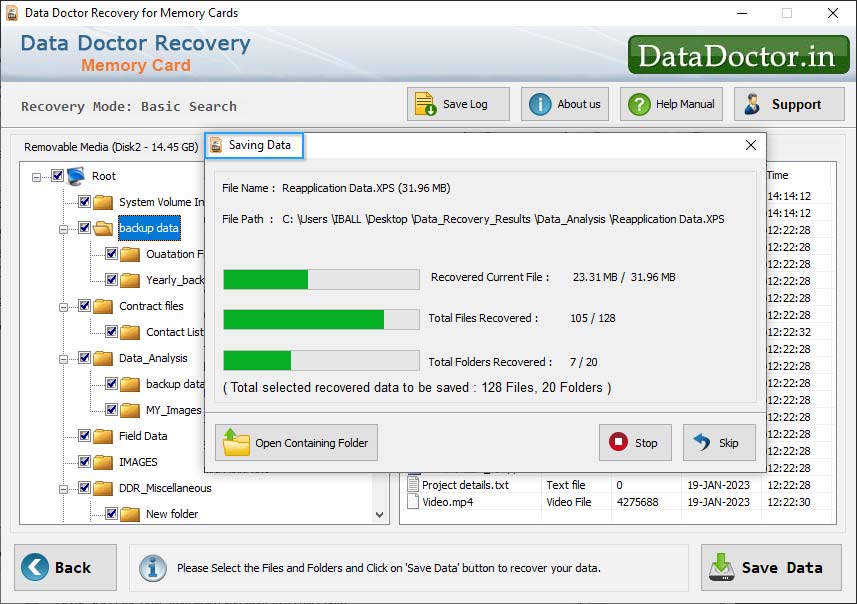
STEP 5 Click on Save as button to save recovered data , now click browse button as shown in [This screen]
Note: Please select only different destination drive to save the recovered data. Saving data in same drive/volume may cause overwriting and your data may lost forever.
Select the drive and click on OK button to save the recovered data.
Software then start saving the selected files in selected destination path as follows:

Click Here for Other Software


